Best Sellers
-
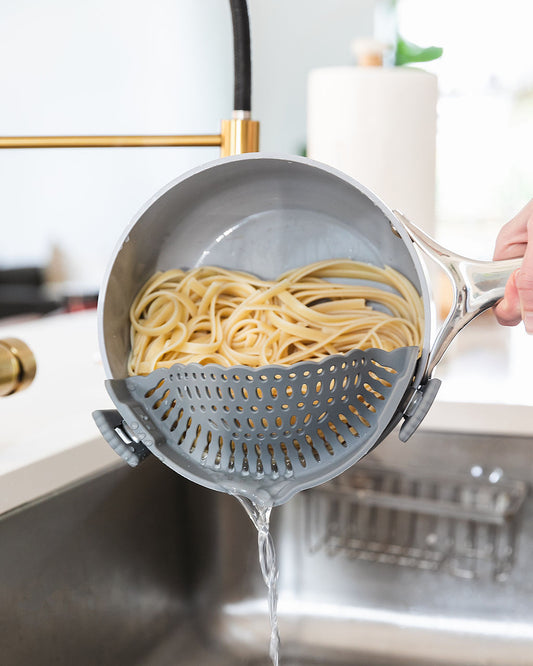
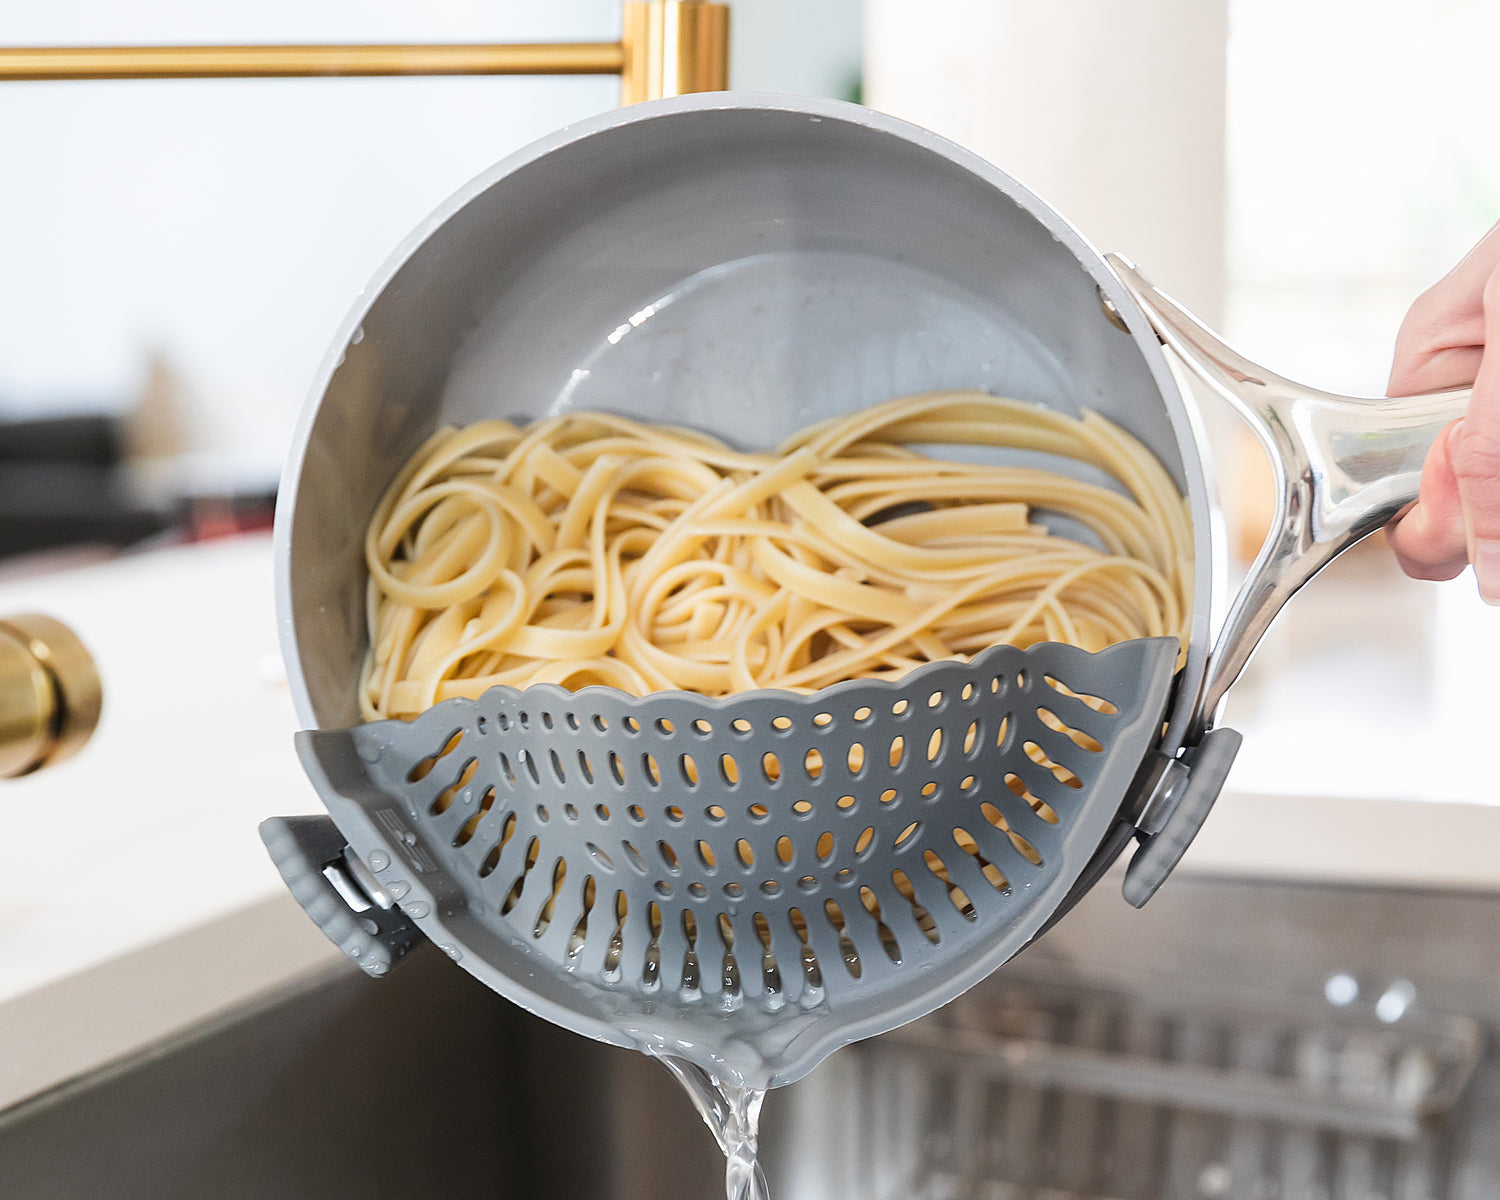
Silicone Clip-On Strainer | Set of 2
Regular price $14.00 USDRegular price$20.00 USDSale price $14.00 USDSale -
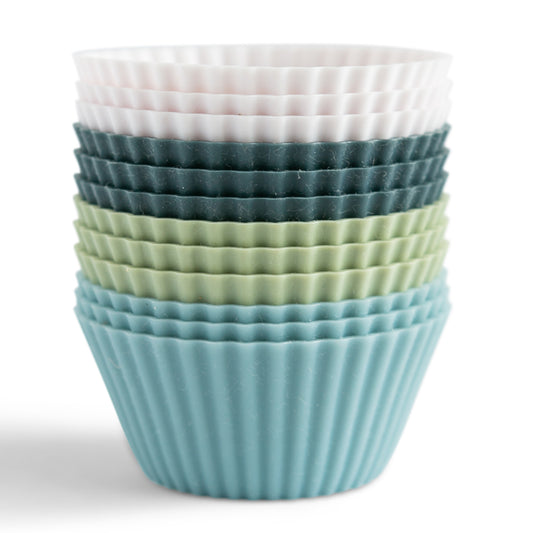
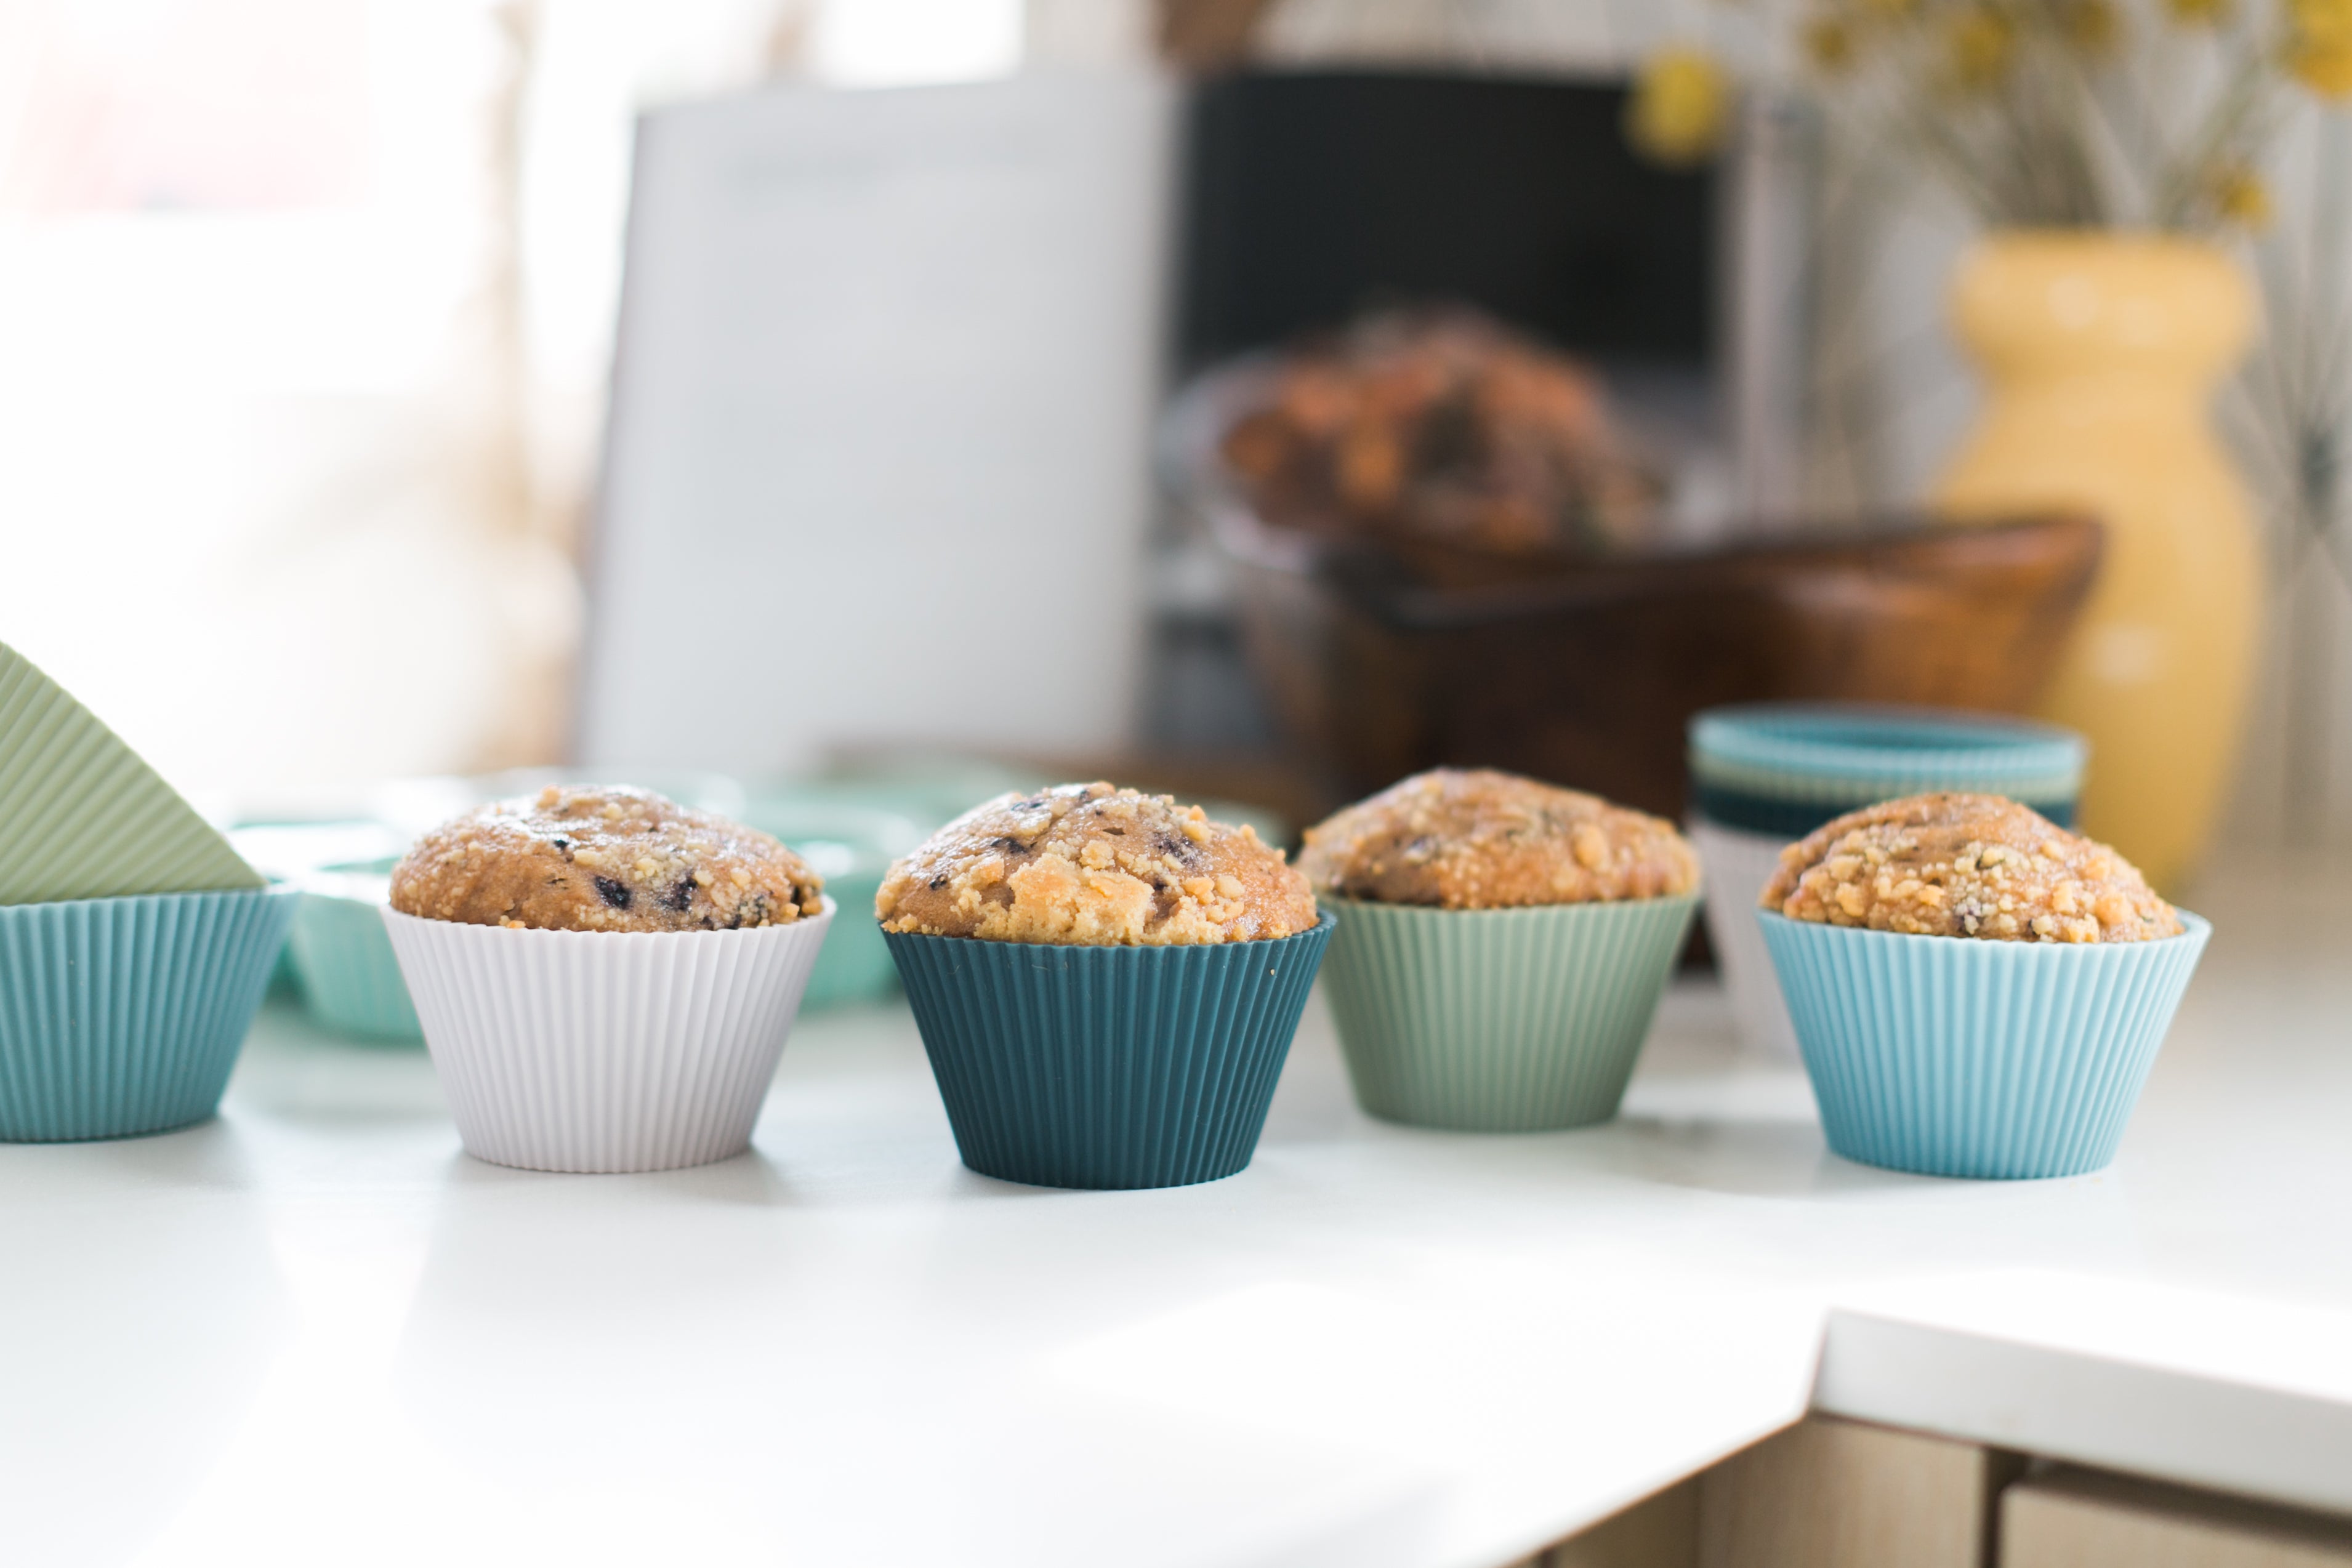
Silicone Baking Cups | The Signature Collection | Regular
Regular price From $9.25 USDRegular price$10.00 USDSale price From $9.25 USDSale -
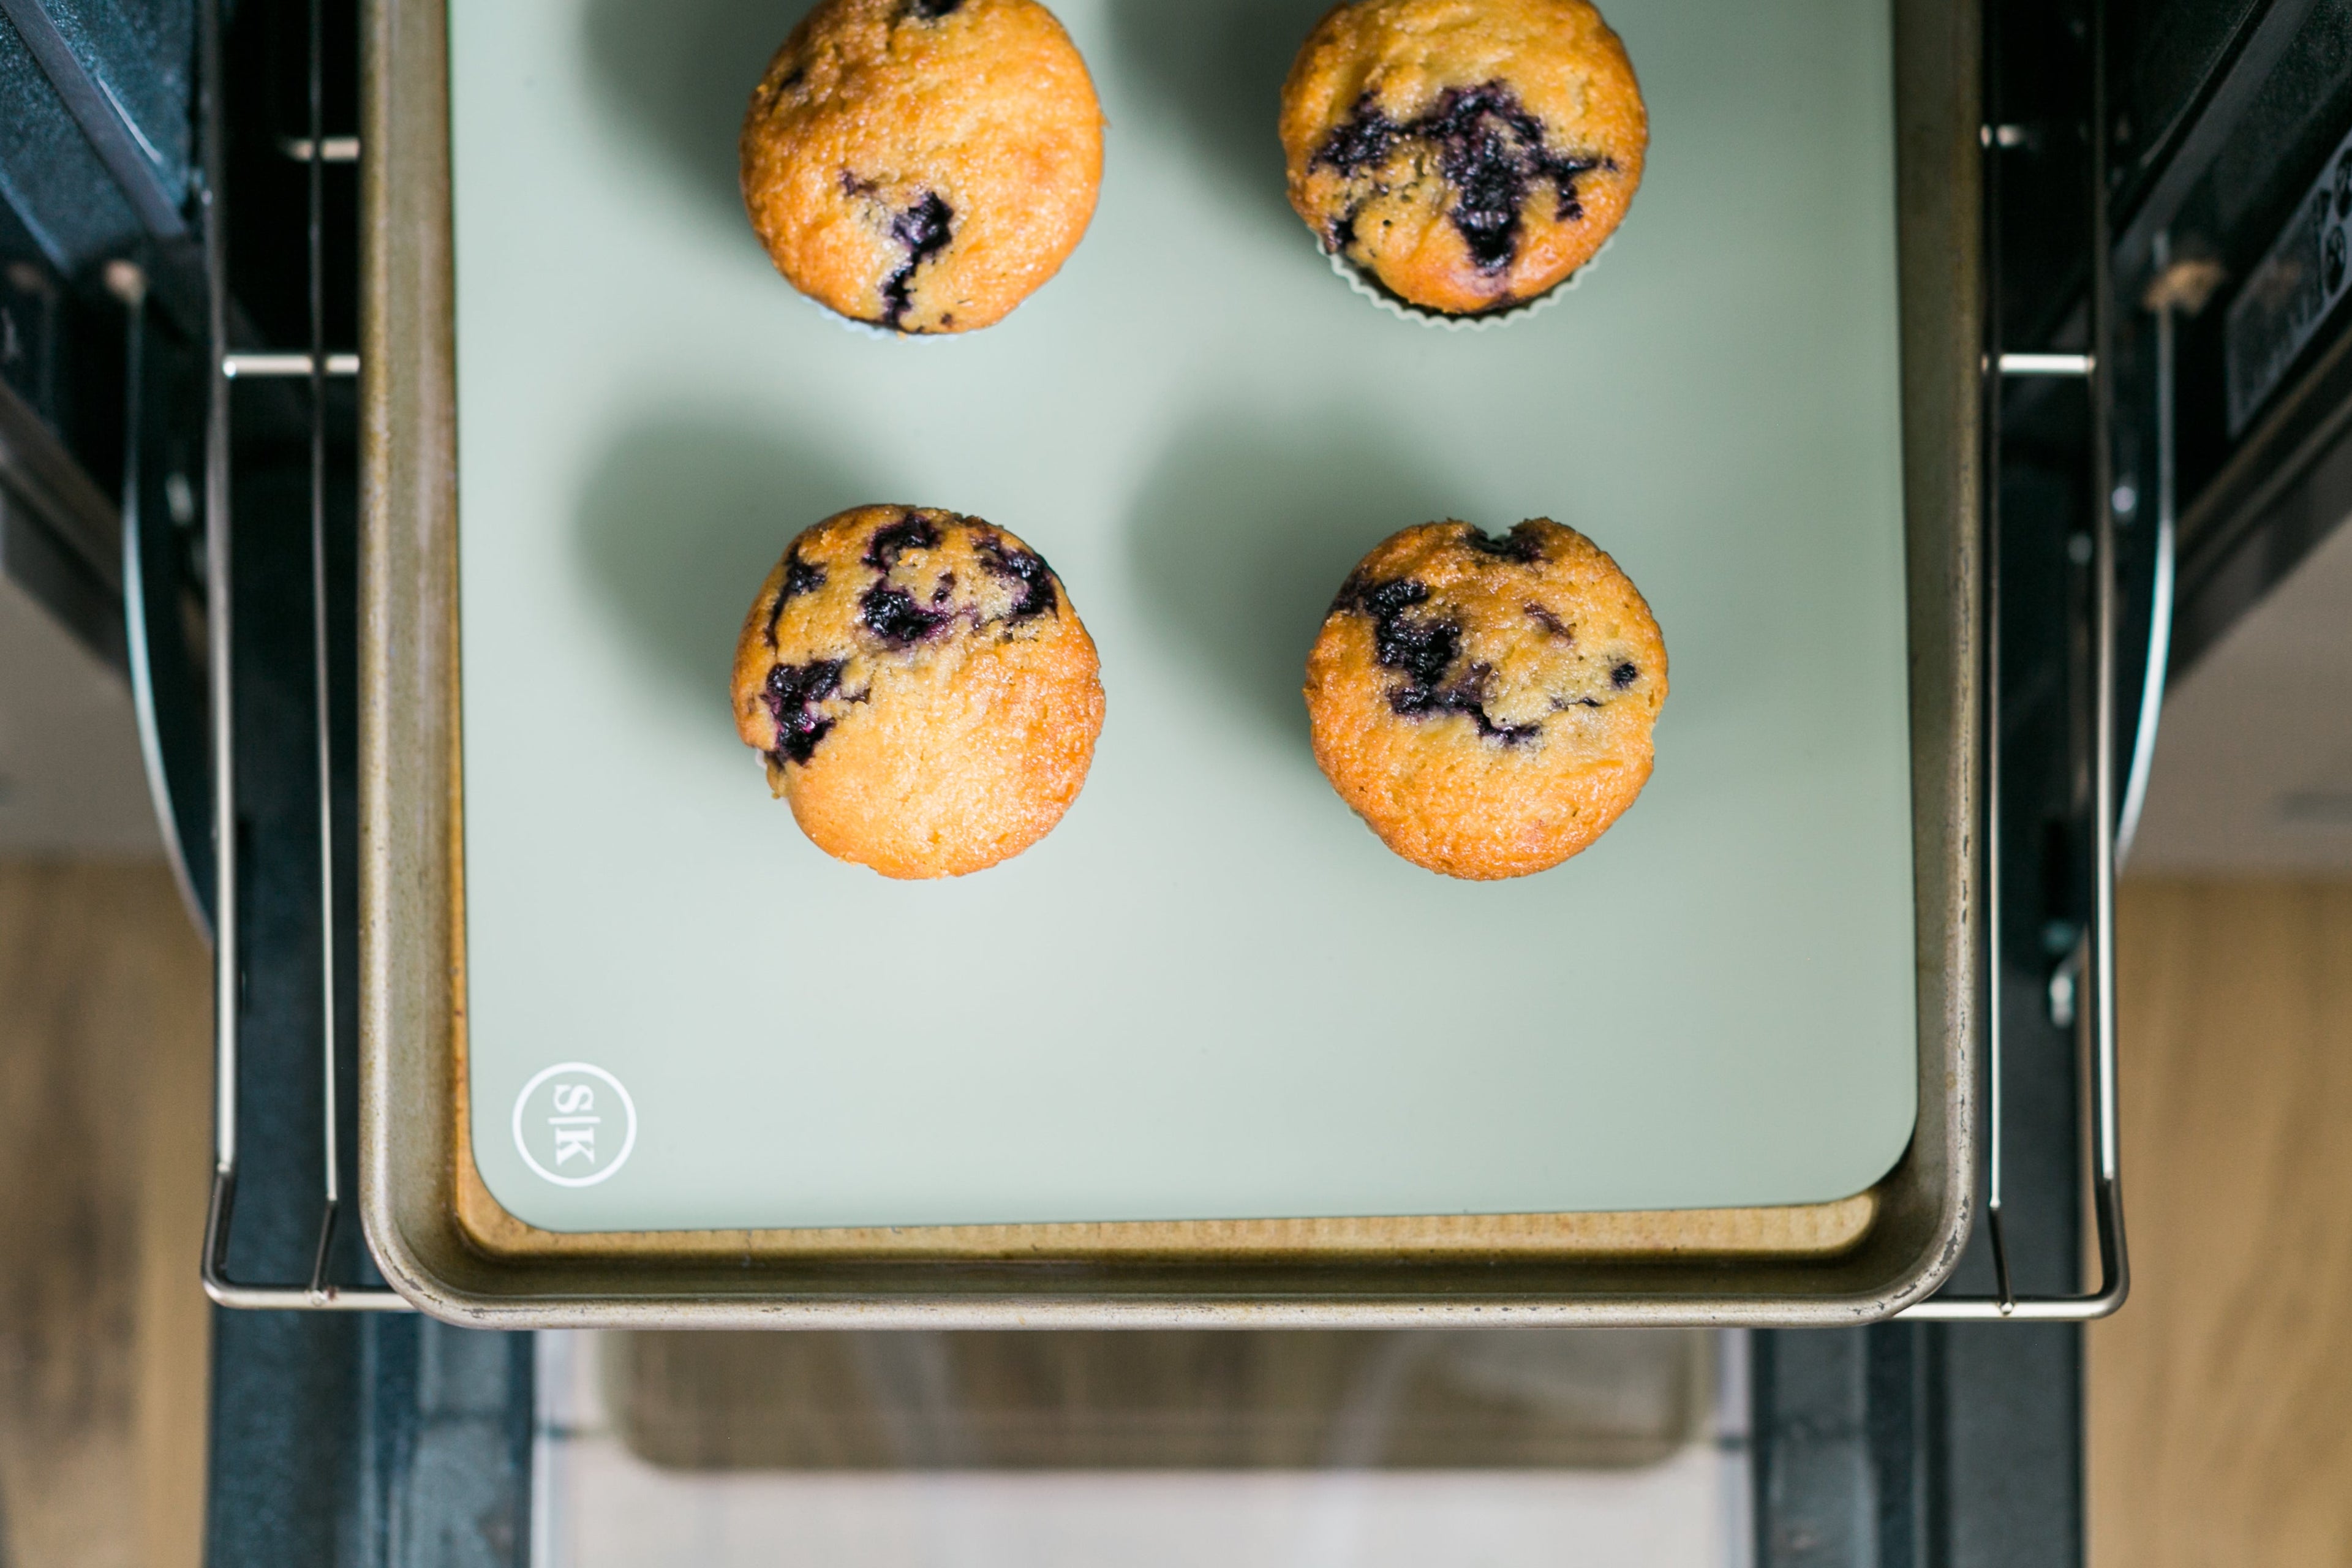
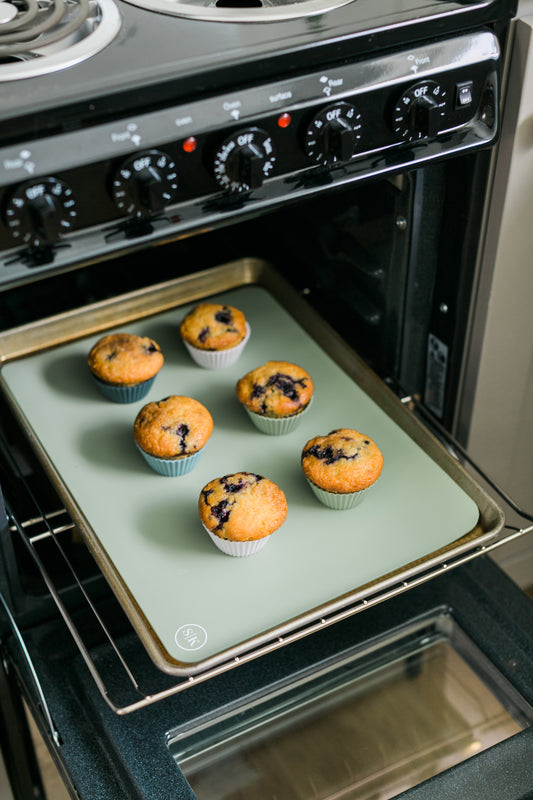
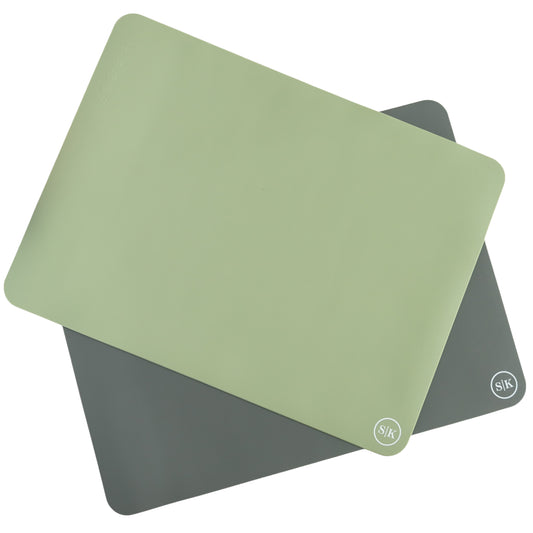
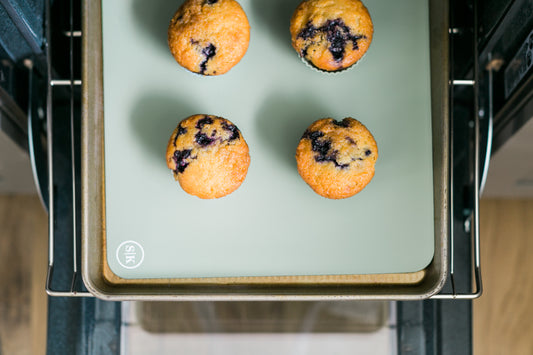
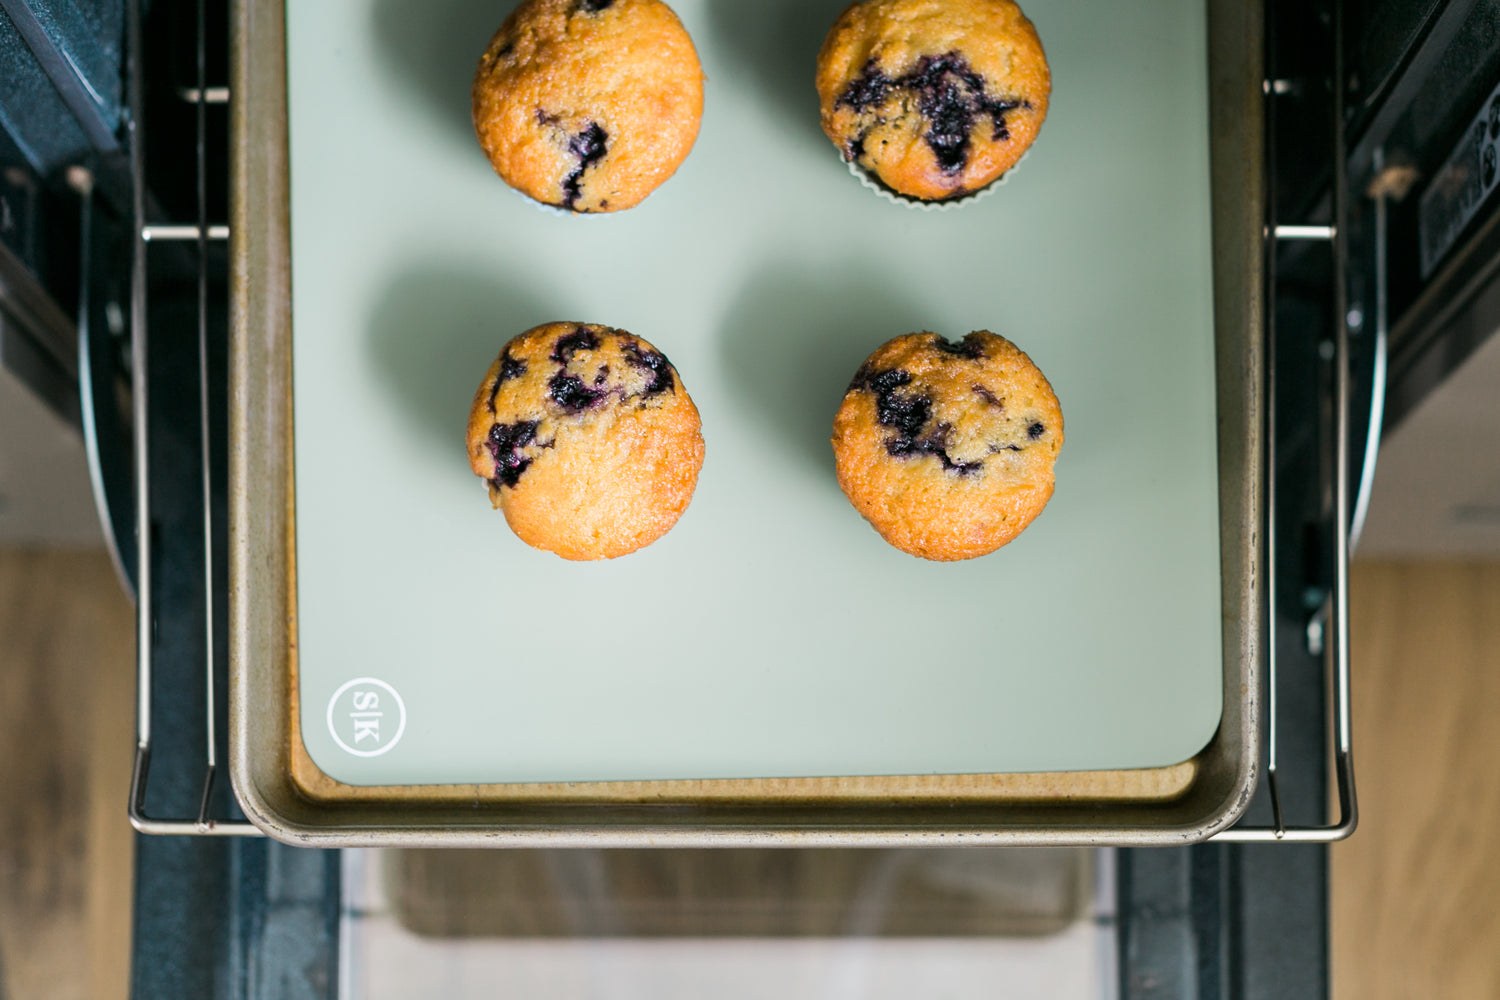
Silicone Baking Mats | Sage Green & Gray
Regular price From $11.75 USDRegular price -
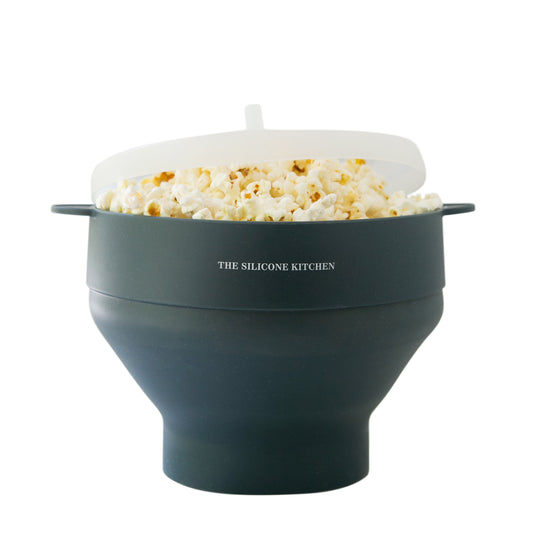
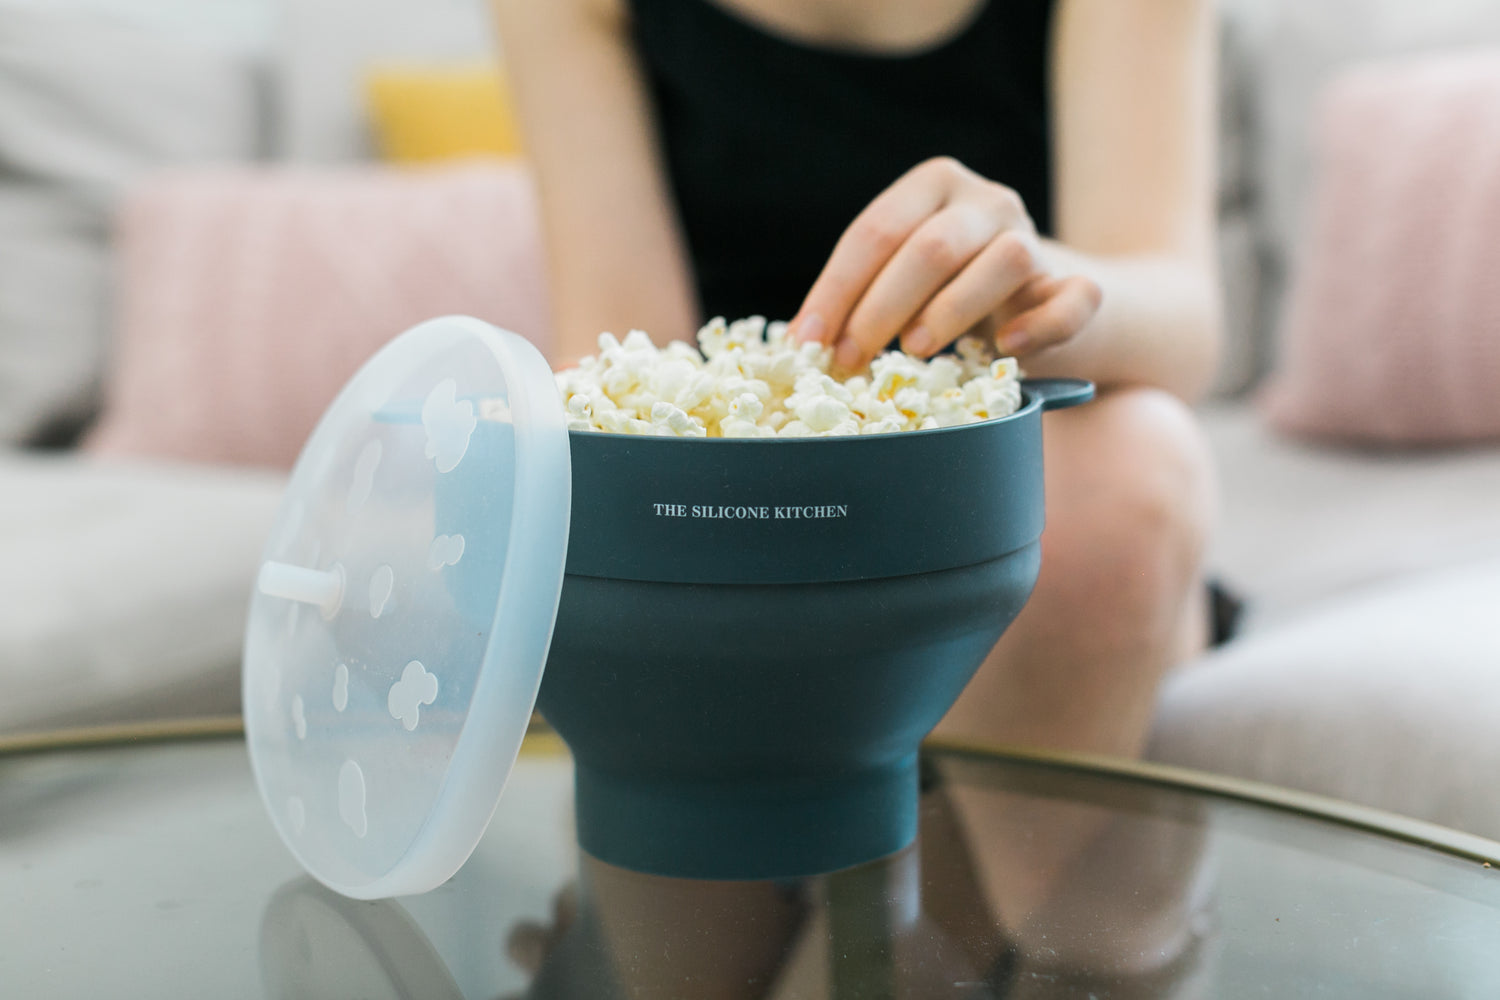
Silicone Popcorn Maker
Regular price $14.75 USDRegular price -
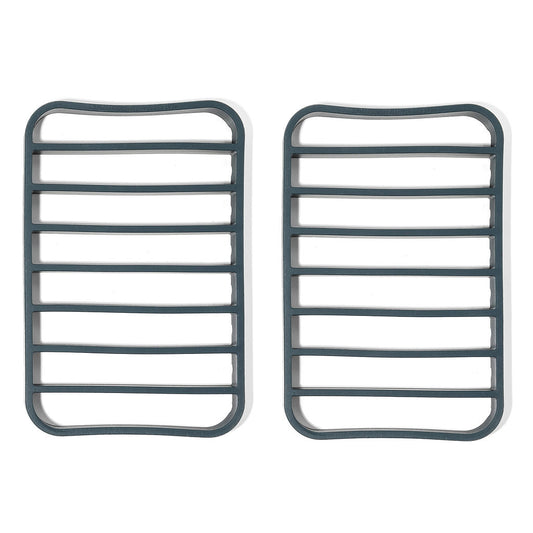
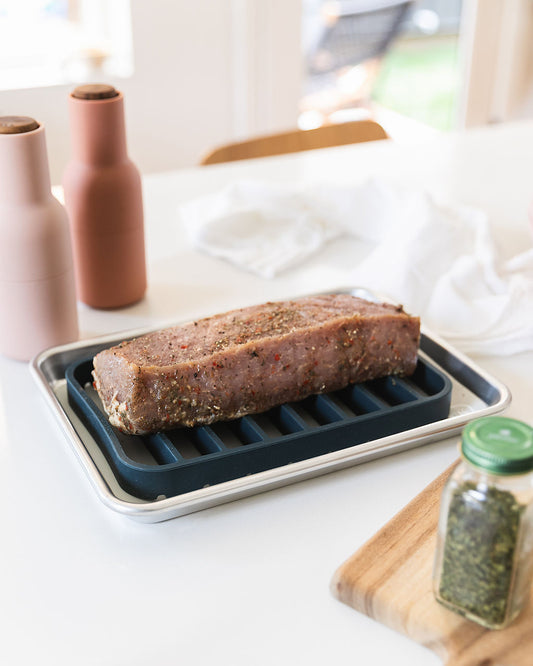
Silicone Roasting Racks | Set of 2
Regular price $21.25 USDRegular price$29.00 USDSale price $21.25 USDSale -
Gift Bundle | Silicone Baking Mats | Sage Green & Gray
Regular price $24.50 USDRegular price$29.00 USDSale price $24.50 USDSale -
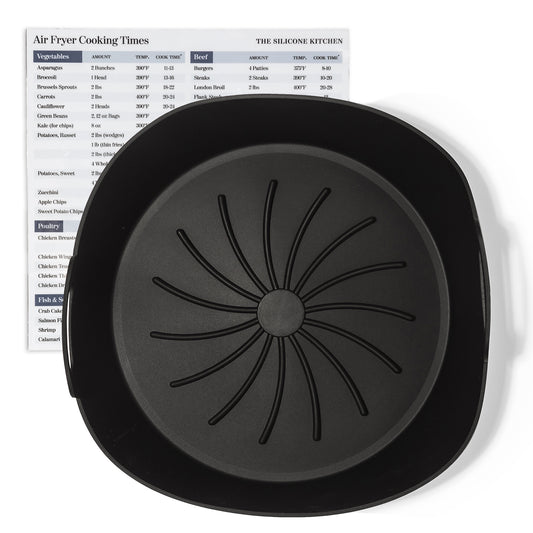
Silicone Air Fryer Liner + Magnet
Regular price $12.25 USDRegular price$15.00 USDSale price $12.25 USDSale -
 Sold out
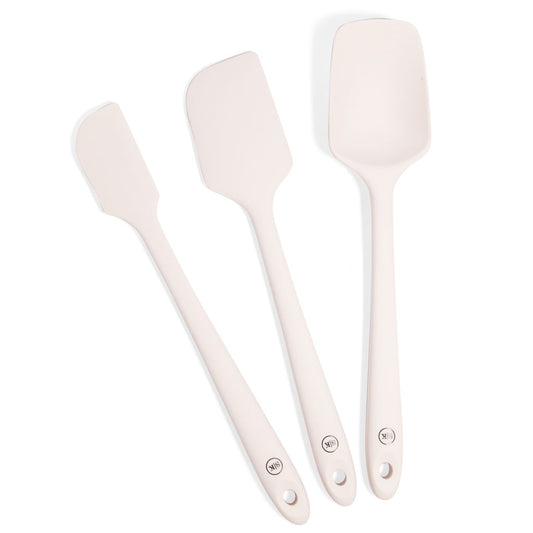
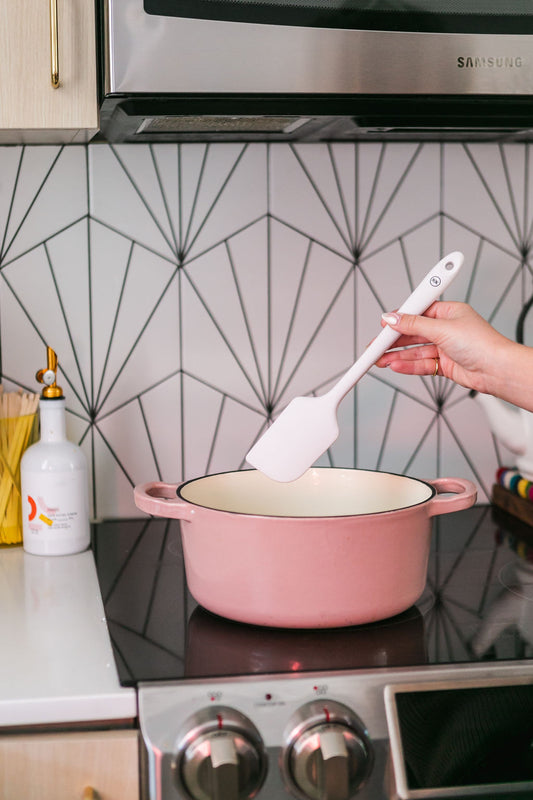
3-Piece Silicone Spatula Set
Regular price $20.00 USDRegular price


Featured Recipe
Sparkling Sugared Cranberry Bites
Both beautiful and delicious, enjoy sparkling sugared cranberry bites this holiday season. The sweet and acidic nature of cranberries pair perfectly with soft cheese, such as brie or blue cheese.
Kitchen Accessories
From silicone baking cups, silicone baking mats, and silicone air fryer liners,...
Kitchen Tools
Kitchen tools to make cooking and cleaning a breeze. Featuring dishwasher safe,...
Kitchen Appliances
Transform your movie night with The Silicone Kitchen Popcorn Maker. Just throw...
Let customers speak for us
I am using the silicone baking cups and also the silicone baking sheets. They seem to be durable, and are easy to clean and baked goods peel off these products easily.

My mom got me two as a gift last year and I use them constantly. I just had to buy myself more cuz an Albanian oven melted the one I traveled with.

I have ordered several products. I love the microwave popcorn maker so much I ordered one for my daughter. Its the best and customer service is great!

Well I got some SK baking supplies for myself and at Thanksgiving I got so many questions and “ooh’s” and “aah’s” about the mats and strainer! The biggest hits were the serving spatulas. So of course, they are now Christmas gifts to family. I hope more products come soon because I’ll keep buying them.
I recently ordered several items. I have been using them quite a bit and absolutely LOVE them! The quality is amazing!! So much better than anything I have used in the past. It also makes me feel better knowing that these are truly a healthier option for me to use while cooking. Also, the owner, Rachel Breuhaus, offers great customer service if you have any questions or concerns. It was a pleasure ordering healthy, high quality products from this company. I definitely plan to buy more in the future. I highly recommend this company.

I was having fun exploring the different products on this site and decided to try the Baking Cups. They look useful for making small meatloafs or individual servings of macaroni and cheese to then pop in to the freezer. Single older adult who cooks in batches and then freezes for reheating. I like the squareness of the cups.

Could have definitely used these for the turkey; have pan, no rack, until now. Very impressed with the quality. I cooked a small beef roast on one. Roasted some vegetables on the other. I hand-wash everything. Clean up was easy.
I would definitely gift these.

A product I did not know I needed until I tried it. How did I live without it?
Fits my large cooking pots well; the 2-quart and 3-quart Revere Ware well; the 1-quart Revere Ware with some maneuvering. Works well on the 8-cup Pyrex Measuring Cup -- better that the pour spout!
I hand-wash everything. The strainers clip easily to one of my dish drying racks. They store well; taking up little space.
Would definitely give as a gift.
Love these spatulas. The skinny works well in the blender to reach down to the bottom and not get stuck on the blades. The Spoonula makes filling the silicone muffin cups a breeze; or scooping out a dollop of soup from the pot to check seasonings. Now I have a set of white spatulas and a different set in black (different vendor)!
Would make a great gift for any person who likes to cook.

Not able to make up my mind about the color, I went with both the Kitchen Starter Set and the Signature Collection of Baking Cups.
So happy I did as I like having a selection of colors in which to bake. Especially if I am experimenting with a new recipe and want to try different options.
The mini size cups make great ice cubes. Slightly larger than my square silicone ice cube tray, the silicone muffin cups release the ice better than the ice cube tray.
I like the stand-alone option for the cups, Do keep in mind the cups need to be supported on a baking tray. I like that the cups do not slide around on the baking tray.
Besides color difference, there is a difference between the Signature Collection and the Kitchen Starter Set cups. The Kitchen Starter Set looks like the paper liners. The Signature Collection has a lip on one side at the top. I noticed this seems to stabilize the cup to some extent.
First thing I baked was carrot cake muffins. The muffins released easily from the cups after 5 minutes of cooling. I used no cooking spray or butter.
If a person did not want so many muffin cups but wanted a larger selection of colors, one could get together with a friend; get one of each set; and divide the sets in two.
These would make a great gift for the baker in one's life.

I have been looking for silicone muffin cups for quite a while now. So happy to have found these and in 3 different sizes. Even better: the set includes 4 baking mats. And a handy, dandy bag in which to store the items. Or use as a reusable produce bag at the local farmers' market.
The small size muffin cup is perfect for making ice cubes in addition to other things. I have a square silicone ice cube tray divided into 9 cubes. The small muffin cups are slightly larger than the cubes from the ice cube tray. The ice also is easier to remove from the muffin cups than the ice cube tray. I have a small serving or catch-all tray that fits 19 small size muffin cups and fits nicely in the freezer.
I baked carrot cake muffins in all three sizes of the muffin cups. The cups worked very well for stand-alone baking. I did not use any spray oil or butter. The muffins popped out quite easily after 5 minutes of cooling. Turning the cup upside down and gently squeezing the lower edge of the cup allows the muffin to pop out easily. The regular and small sized muffins fit nicely into Mason jars for storage in the refrigerator or freezer.
The silicone baking sheets are very nice with a dull surface and a shiny surface. I am able to roll out pie dough with a minimum sprinkling of flour and have no sticking issues. I did find the sheet buckled in the oven with baking and returned to flat after cooling. Having used a number of different types of silicone baking mats, I was surprised at the waving of the sheets. I do like the colors and they fit my half-sheet and quarter-sheet pans nicely. Looking forward to baking a batch of my nut and seed crackers on them.
Definitely a great gift for the baker in one's life. The muffin cups would also work well for the crafter, seed grower, jigsaw puzzle worker in one's life for sorting of small items.

Just tried mine yesterday, drained water from the pan without loosing any of the cooked food. Clips held tight to the pan. Storage space of the item minimal. Definitely recommend.
Realized I did not have a pan with me, with a rack.
Found this silicone rack & thought I could add it to any pan. It has arrived! It is thick (outside perimeter & ribs forming the rack). I bought two as some items will be bigger. I have many silicone kitchen items. All have withstood cooking temps, & staining (altho I am cautious with red sauces). I did not get to use these -too late for Thanksgiving- but I have them for the future. Easy to clean, store & travel with if needed! Recommend silicone products in general, but these racks are extraordinary. Christmas is coming up!